As an Amazon Associate I earn from qualifying purchases.
Swimming is a fantastic all-around workout that enhances cardiovascular health, muscular strength, and flexibility. To maximize your swimming, it’s important to focus on numerous routines and approaches. One such workout that might enhance your leg strength and swimming efficiency is using a kickboard. We’ll walk you through every step of how to utilize a kickboard for swimming in this in-depth manual.
Step by step guideline has been given
Step 1: Gather Your Equipment
Make sure you have the appropriate gear before beginning your kickboard exercise:
1. Swimsuit:
Because they reduce drag and enable swift propulsion through the water, what size swimsuits are necessary for utilizing a kickboard while swimming. They improve mobility over ordinary clothes, alleviate discomfort, and support hydrodynamics, all of which contribute to a safer, more effective, and more enjoyable swimming experience.
2. Kickboard:
Pick the best one kickboard that fits your level of expertise. Kickboards are made of a variety of materials and shapes. While more experienced swimmers might utilize smaller, less buoyant kickboards for increased resistance, beginners might prefer a more buoyant kickboard.
3. Goggles:
To use a kickboard while swimming, you must have goggles for deep sea since they protect your eyes from water and chlorine and allow for clear vision. They improve safety, let you keep your form, and make swimming more enjoyable by reducing irritability and vision blur.
4. Swim Cap (optional):
Due to their multipurpose nature, swim caps are useful when utilizing a kickboard while swimming. By minimizing hydrodynamic resistance, they streamline the swimmer’s head. When doing out with a kickboard, this promotes better body positioning, more effectiveness, and faster movement. Perfect Swim caps also shield your hair from the corrosive effects of pool chemicals and aid in keeping your hair out of your face so you can concentrate on your stroke and enjoy an uninterrupted swim.
5. Swim Fins (optional):
Swim fins have various advantages, making them a useful addition when utilizing a kickboard for swimming. Fins make your leg muscles work harder and enhance leg strength by increasing water resistance. They increase propulsion, which makes kicking more effective. Fins can also assist you maintain perfect form while using a kickboard by balancing and placing your body. Swim fins are a handy tool for swimmers wishing to increase the intensity of their leg exercises and enhance their overall swimming performance, however they are not absolutely necessary. So duck feet swim fins can be the best choice for swimmers.
Step 2: Warm-Up
Swimmers should always warm up before using a kickboard for a variety of important reasons.
1. Injury prevention:
A proper warm-up raises your body’s core temperature and increases blood flow to the muscles. This reduces the risk of sprains, rips, and other injuries when you’re using the kickboard.
2. Improved Muscle Performance:
A good warm-up gets your muscles ready for action. The ability of your muscles to contract more powerfully and effectively after warming up is crucial for producing power in your legs during kickboard activities.
3. Muscles flexibility:
Warm muscles are more flexible, allowing for a wider range of motion in the water. This is crucial for kicking, which depends on smooth leg movements and flexible joints.
4. Cardiovascular Readiness:
By progressively raising your heart rate before exercise, you can get your cardiovascular system ready for the higher demands of physical activity. This lessens the possibility of cardiovascular stress and helps prevent sudden increases in heart rate.
5. Mental Preparation:
A warm-up is a chance to get in the right frame of mind for your workout. It allows you a little opportunity to concentrate on your objectives, breathing, and technique while preparing your mind for a successful kickboard workout.
6. Optimum Technique:
During a warm-up, you can concentrate on honing your swimming form and body position, which will transfer over to your kickboard training. Technique is essential for effectiveness and damage avoidance.
Start with a few minutes of easy swimming to adequately warm up for utilizing a kickboard while swimming. Select a stroke that feels natural to you, such freestyle or backstroke, and gradually up the effort. Put your attention on taking slow, deep breaths and moving smoothly.
Include some dynamic stretches in your warm-up regimen, focusing on the muscles your kickboard movements will need. These stretches increase your range of motion and flexibility.
A warm-up is a crucial stage in ensuring a secure, efficient, and enjoyable kickboard session, to sum up. It gets your body ready both physically and emotionally, lowers the chance of being hurt, and creates the ideal environment for a productive swimming session.
Step 3: Proper Body Position
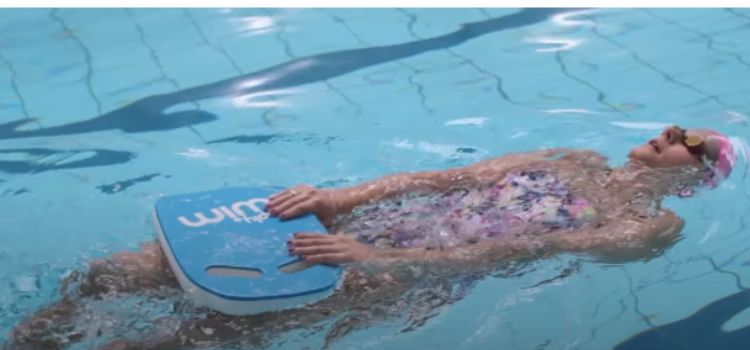
Keep a correct body position in the water before adding the kickboard to your exercise routine. Your efforts will be effective if your body is positioned properly, and you’ll prevent putting undue tension on your muscles. Here’s how to keep your body in the appropriate alignment:
- Keep your body horizontal in the water, with your head level with your spine and facing downward.
- Make sure your hips and legs are at the same depth and that your body is parallel to the water’s surface.
- Keep your legs close to the surface and kick gently and continuously to prevent sinking.
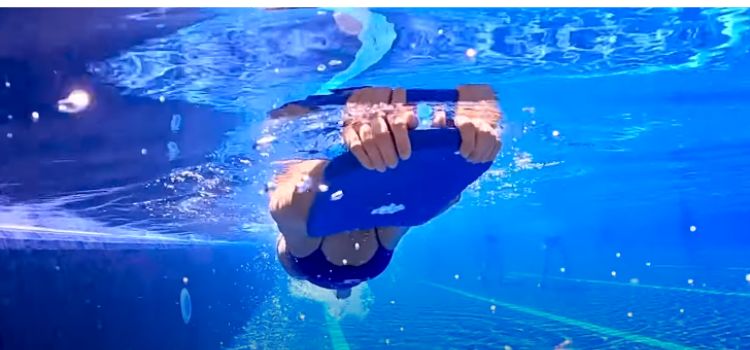
Step 4: Holding the Kickboard
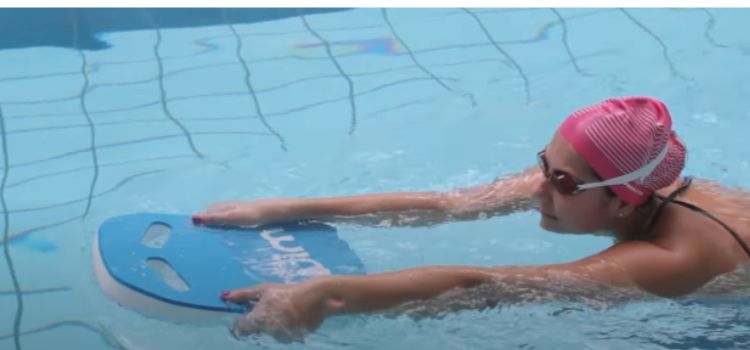
The kickboard should be introduced once the proper body position has been established. To hold it, do as follows:
1. Select the Proper Position: Place your arms fully extended and hold the kickboard firmly in place. The kickboard should be placed at the water’s surface, and your body should stay horizontal.
2. Hand Position: Position your hands on the sides of the kickboard, close to the top. While pressing down on the top surface with your hands, your fingers should be holding the edges.
3. Keep Your Elbows Slightly Bending: To avoid putting too much tension on your joints, keep your elbows slightly bent.
Step 5: Kicking Techniques
The main goal of using a kickboard is to concentrate on your leg strength and kick technique. Here are the essential actions to carry out an efficient kick:
1. Flutter Kick:
The most frequent kick used in freestyle and backstroke is the flutter kick. Your legs must move continuously and rhythmically while doing this. With a kickboard in hand, start by standing with your legs straight but not locked at the knees.
• Kick lightly and steadily from the hips, keeping your ankles untroubled.
• Keep your toes pointing, and kick with each leg in turn.
2. Breaststroke Kick:
The breaststroke kick, which simultaneously moves both legs, is a more complex and potent kick. The breaststroke and butterfly strokes are where it is most frequently employed. Using a kickboard, practice the breaststroke kick:
•Start by standing with your feet together and your legs straight.
•Bring your heels up to your buttocks while bending your knees.
•Kick both legs forth at the same time, then bring them back together in a circular motion.
•Keep moving at a slow, steady speed to prevent splashing.
3. Dolphin Kick:
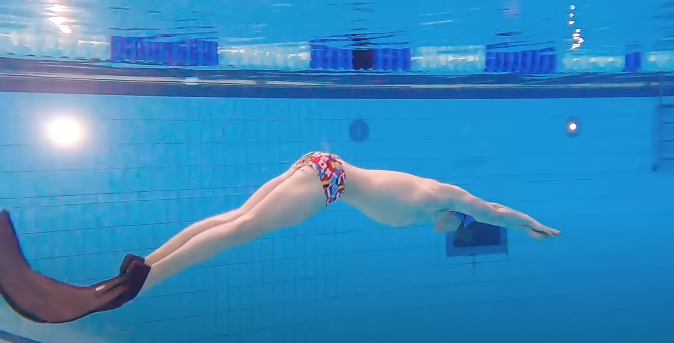
Underwater swimming and the butterfly stroke are the two main uses of the dolphin kick. Both legs are moved simultaneously in an undulating pattern. To practice the dolphin kick, keep your legs straight and close together while using a kickboard.
• From your hips to your toes, glide in a smooth, wave-like motion. The dolphin kick should be executed powerfully and rhythmically to advance you.
4. Scissor Kick:
The scissor kick, which involves moving your legs in a manner akin to scissor action, is frequently utilized in the sidestroke. To use a kickboard while performing the scissor kick:
• Place your feet just wider than shoulder-width apart and lengthen your legs.
•Bring one leg forward while simultaneously bringing the other leg back.
•Repeat the scissor-like action while reversing the motion and crossing your legs.
Step 6: Breathing Techniques
You can work on breathing technique enhancement while utilizing a kickboard. Swimming requires controlled breathing, and using a kickboard to practice can improve your performance. How to improve your breathing while using a kickboard is as follows:
1. Freestyle and Backstroke:
You can practice your bilateral breathing technique while doing freestyle or backstroke with a kickboard. To achieve balanced muscle development, do this while breathing on both sides of your body.
- Breathe in with your head tilted to the side.
- When your face is in the water, exhale.
- Make sure your breathing is controlled and rhythmic.
2. Breaststroke:
Practice timing and synchronization between your kicks and breathes when using a kickboard for breaststroke.
• Breathe deeply as your head rises and your arms start to recover.
• Breathe out as your head descends and your arms finish their draw.
3. Butterfly:
The butterfly stroke requires a difficult breathing technique. Keep your head down and your face in the water as you practice the butterfly kick while using a kickboard. While your face is in the water, you should inhale quickly and violently expel.
Step 7: Sets and Repetitions
Set up your repetitions and sets based on your fitness level and training objectives to develop a successful kickboard routine. The following general recommendations for sets and repetitions:
1. Novices: If you’ve never used a kickboard before, start with shorter sets and concentrate on keeping your technique correct. Aim for sets that are 25–50 meters long (1-2 lengths of a typical pool), with enough rest in between.
2. Intermediate: As you get more accustomed to using the kickboard, extend the distance. Try 100–200-meter sets with shorter rest periods.
3. Advanced: Advanced swimmers can train with kickboard drills. This may involve using a kickboard for a variety of objectives, such as enhancing technique, speed, or endurance. Sets may measure 200 to 400 meters or longer.
4. Interval Training: Include interval exercise to increase your cardiovascular fitness and leg strength. Swim 25 meters quickly, then 50 meters at a slower pace, for instance. To get the specified number of sets, repeat this pattern.
5. Drills: Kickboard drills can be used to improve certain parts of your swimming technique, such as timing, leg strength, or body position. You can modify these exercises to fit your own objectives and needs.
Step 8: Monitoring Progress
Tracking your progress is crucial to ensure you’re consistently enhancing your fitness and swimming abilities. Here are some ways to keep track of your development when utilizing a kickboard:
1. Note the Times: Keep track of how long it takes you to use the kickboard to cover various distances. You may evaluate your stamina and speed using this.
2. Verify Your Form: Examine your posture and technique frequently. Are you keeping your body in the right position? Are you kicking effectively and efficiently? The first step toward improvement is recognizing it.
3.Evaluate Your Breathing: Evaluation of Breathing Pay close attention to how you breathe. Do you have regular, effective breathing? Bilateral breathing should be practiced and tailored to your individual strokes.
4. Set objectives: Set both immediate and long-term objectives for your kickboard training. For instance, you might want to boost your kicking speed or the distance you can travel with the kickboard.
5. Vary Your Workouts: Include a variety of sets, drills, and exercises to prevent stagnation. Your muscles will be tested by this, which will keep your training from plateauing.
Step 9: Cool Down
After your kickboard workout, it’s important to calm down and gradually lower your heart rate. How to calm down quickly is as follows:
1. Swim at a Gentle Pace: Practice swimming at a gentle pace for a few laps while concentrating on long, fluid strokes.
2. Stretch: Do some gentle stretches on the pool deck or in the water. Pay attention to your shoulders, back, and legs.
3. Hydrate: Rehydrate by consuming water to replenish the fluids you lost while exercising.
4. Reflect: Give your training session some thought. Think on what worked well and what you can do better in your subsequent session.
Step 10: Safety Precautions
When swimming with a kickboard, safety should always come first. Here are some things to remember regarding safety:
1. Swim in a Supervised Area: Make sure you swim in a pool with a lifeguard on duty or other swimmers around. Give someone advance notice of your workout schedule and expected return time if you’re training alone.
2. Recognize Your Limits: If you’re just starting out, try not to overdo it. Pay heed to your body’s cues and take breaks as needed.
3. Maintain Hydration: Swimming can cause dehydration. While working out, keep a water bottle close and sip frequently.
4. Sun protection: If you’re swimming outside, use sunscreen to shield your skin from UV rays that can be damaging.
5. Respect Others: Swimmers should be considerate of one another’s space and be aware of their surroundings. Avoid collisions and be considerate to other pool users.
Conclusion
By using a kickboard, you can improve your leg strength, refine your kicking technique, and expand your swimming knowledge. By following the instructions detailed in this article, you can get the most out of your kickboard exercises and work toward achieving your swimming goals, whether they’re for your endurance, your technique, or just staying in shape. As with any sport, progress in swimming requires time and regular work. So jump in the water, grab your kickboard, and enjoy the road of improving and increasing your swimming confidence.
Amazon and the Amazon logo are trademarks of Amazon.com, Inc, or its affiliates.
Leave a Reply